
Autodesk artcam premium 2018 has become a go-to software for professionals and hobbyists involved in woodworking, CNC machining, and 3D modeling. With its robust features and user-friendly interface, it’s an essential tool for crafting intricate designs and models. Whether you’re a seasoned professional or just starting, ArtCAM provides the versatility and precision needed to bring your creative ideas to life.
Applications of ArtCAM 2018
ArtCAM 2018 isn’t limited to one type of work. Its versatility is evident in its various applications:
- Woodworking: Perfect for creating intricate carvings, furniture details, and decorative designs.
- Jewelry Design: Enables precise modeling for ornate custom jewelry pieces.
- CNC Machining: Offers precision and control for designing machine parts and prototypes.
Whether you’re making a decorative panel for furniture or a custom piece of jewelry, ArtCAM provides the tools to do it.
What is ArtCAM software used for?
ArtCAM is a CAD/CAM software primarily used for designing and machining relief models, engraving, and creating 3D sculptures for manufacturing. It is widely used in industries such as woodworking, sign-making, jewelry, coin making, and CNC machining.
Key Uses of ArtCAM:
- 3D Modeling & Relief Design
- Creates detailed 3D浮雕 (relief) models from 2D vector artwork or images.
- Used for decorative carvings, architectural elements, and artistic sculptures.
- CNC Machining & Engraving
- Generates toolpaths for CNC routers, lasers, and milling machines.
- Used for cutting, carving, and engraving materials like wood, metal, plastics, and composites.
- Sign Making & Lettering
- Designs and carves 3D signs, logos, and decorative text.
- Supports V-carving (chiseled lettering) and 3D text effects.
- Jewelry & Coin Design
- Creates intricate patterns and detailed reliefs for jewelry, medals, and coins.
- Exports models for casting or 3D printing.
- Furniture & Woodworking
- Used for ornate furniture designs, moldings, and decorative panels.
- Vector & Raster Art Conversion
- Converts 2D images (JPEG, PNG, etc.) into 3D浮雕 models.
- Works with vector files (DXF, EPS, AI) for precise machining.
autodesk artcam premium 2018 Versions:
- ArtCAM Pro (discontinued by Autodesk in 2018 but still used in many industries).
- CarveCo (a successor by former ArtCAM developers, offering similar functionality).
Alternatives to ArtCAM:
- CarveCo (direct successor)
- Aspire by Vectric (popular for CNC carving)
- Fusion 360 (for CAD/CAM with some relief modeling)
- ZBrush & Blender (for artistic 3D modeling)
ArtCAM is particularly valued for its user-friendly interface and powerful浮雕 modeling tools, making it a favorite among CNC artisans, woodworkers, and engravers. Would you like recommendations for similar software based on your needs?
ArtCAM Pro 9.1 Download: 2025 Updated
Step-by-Step Guide to Download ArtCAM 2018
Downloading ArtCAM 2018 might sound complex, but this guide will make the process simple and stress-free.
Artcam 2018 requirements and Preparation
Before downloading ArtCAM 2018, ensure your system meets these requirements:
- Operating System: Windows (7, 8, or 10)
- Processor: Intel Core i3 or better
- RAM: At least 4 GB
- Storage: Minimum 10 GB free space
- Graphics Card: Dedicated GPU recommended for 3D modeling
Having these requirements ready will save time and prevent errors.
Artcam 2018 software free download
Follow these steps to download the software:
- Visit ( design4cnc.in ) that offers the ArtCAM installation file.
- Check the version and confirm compatibility with your system.
- Click on the download link to initiate the process. Your download should start automatically.
- Save the file to a location on your computer where it’s easy to find.
To avoid issues, use a stable internet connection during the artcam 2018 software free download process.
Installing ArtCAM 2018 on Your Device
Once downloaded, installing the software is straightforward:
- Open the downloaded file and follow the on-screen instructions.
- Agree to the terms and choose a destination folder for installation.
- Wait for the installation to complete. This may take a few minutes.
- Launch the software and complete any activation steps if prompted.
If you encounter errors, double-check your system compatibility and available resources.
Tips for Getting Started with ArtCAM 2018
Now that you’ve installed ArtCAM, let’s talk about how to jump in and make the most of this powerful tool.
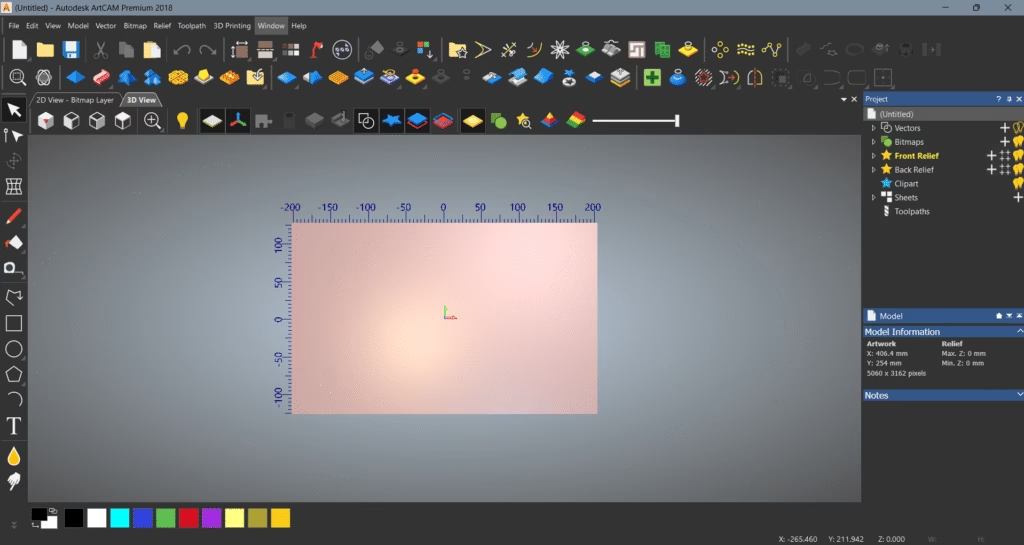
Exploring the Interface
ArtCAM 2018’s interface is designed to be simple yet efficient. It features:
- A toolbar with commonly used functions.
- Workspaces where you can toggle between 2D and 3D views.
- Panels that display layers, history, and settings.
Spend some time familiarizing yourself with these elements for a smoother workflow.
Starting Your First Project
Kick off your first project by exploring the software’s basic tools:
- Open the software and create a new project.
- Experiment with shapes, patterns, and text options.
- Import a 3D model to see how editing works.
- Save your progress frequently to avoid losing work.
Hands-on practice is the best way to get comfortable with autodesk artcam premium 2018.
Common Issues and Troubleshooting ArtCAM 2018
Even the best software can have its hiccups. Here are some common problems and their solutions.
Errors During Installation
- Problem: Installation hangs or crashes.
- Solution: Check that your OS and hardware meet the system requirements. Re-download the installation file if necessary.
Performance Optimization Tips
To keep autodesk artcam premium 2018 running smoothly:
- Close unnecessary programs while using the software.
- Update your graphics drivers to the latest version.
- Save large projects incrementally to reduce memory load.
These practices will help you avoid slowdowns and glitches.
ArtCAM is a versatile software tool that combines user-friendliness with advanced capabilities. Whether you’re working on detailed woodworking designs or crafting complex 3D models, its features make the process intuitive and efficient. Follow the steps above to download and install it without hassle, and take advantage of the tips provided to get the most out of your projects.
Ready to elevate your creative work? Explore everything ArtCAM has to offer and see the difference it can make in your designs.
ArtCAM is no longer available ?
Autodesk ArtCAM® software has been discontinued.
As of July 7, 2018, Autodesk ArtCAM has been discontinued with no planned future releases or updates.
Customers who had an active ArtCAM subscription between February 7, 2018, and July 7, 2018, will be provided with a non-maintained perpetual license.
Perpetual licenses
Customers who have a perpetual license of ArtCAM can continue to use their license without maintenance.
Continued support for ArtCAM
ArtCAM technical support will be available in English from Autodesk until November 1, 2018.
How to create a 3D toolpath in ArtCAM 2018?
Creating a 3D toolpath in ArtCAM 2018 involves generating CNC machining instructions from a 3D relief model. Below is a step-by-step guide:
Steps to Create a 3D Toolpath in autodesk artcam premium 2018
1. Open or Create a 3D Relief Model
- If you don’t already have a 3D model:
- Import a 2D vector design (DXF, AI, EPS) and use Relief > Create Relief to extrude it.
- Convert a bitmap image (JPEG, PNG, BMP) into a relief using Relief > Create Relief from Bitmap.
- Alternatively, sculpt a 3D model manually using ArtCAM’s Relief Editing tools.
2. Enter the Toolpath Tab
- Go to the Toolpaths section (top menu or side panel).
3. Select a 3D Machining Strategy
- 3D Roughing Toolpath (removes bulk material quickly):
- Click Toolpaths > 3D Roughing.
- Choose a large end mill or ball-nose bit for fast material removal.
- 3D Finishing Toolpath (for fine details):
- Click Toolpaths > 3D Finishing.
- Select a smaller ball-nose or tapered bit for precision.
4. Configure Tool & Cutting Parameters
- Tool Selection:
- Pick an appropriate end mill, ball-nose, or V-bit.
- Adjust diameter, stepover (10-20% for finishing), spindle speed, and feed rate.
- Machining Limits:
- Define material thickness and cutting depth.
- Stepdown (for roughing):
- Set a larger stepdown (~50% tool diameter) for roughing.
- Use a smaller stepdown (~5-10%) for finishing.
5. Generate & Simulate the Toolpath
- Click Calculate to generate the toolpath.
- Use Toolpath Preview to simulate the cut and check for errors.
6. Save the Toolpath in CNC-Compatible Format
- Go to Toolpaths > Save Toolpath.
- Choose a G-code format (e.g., .NC, .GCODE, .TAP) compatible with your CNC machine.
Pro Tips for Better 3D Toolpaths
✔ Use Multiple Passes:
- Roughing pass (with a large tool) → Finishing pass (small tool for details).
✔ Adjust Stepover: - 10-15% for fine finishes, 20-30% for faster but rougher cuts.
✔ Check Z-Zero & Material Setup: - Ensure your CNC machine’s Z-zero matches ArtCAM’s settings.
Troubleshooting
⚠ Tool Crashes into Model? → Check rapid plunge heights and clearance planes.
⚠ Poor Detail? → Use a smaller finishing tool and reduce stepover.
⚠ Excessive Machining Time? → Optimize with adaptive clearing (if available).
Would you like help with specific tool settings for materials like wood, metal, or plastic?
This design is wicked! You obviously know how to keep a reader entertained. Between your wit and your videos, I was almost moved to start my own blog (well, almost…HaHa!) Great job. I really enjoyed what you had to say, and more than that, how you presented it. Too cool!
A lot of thanks for all your valuable efforts on this web page. My mother delights in managing investigations and it’s really obvious why. We hear all about the lively medium you offer priceless suggestions on the blog and in addition foster contribution from people on that matter and our own princess is undoubtedly understanding a whole lot. Take pleasure in the remaining portion of the new year. You’re doing a fabulous job.
A few things i have always told folks is that when looking for a good on-line electronics store, there are a few components that you have to take into consideration. First and foremost, you want to make sure to find a reputable as well as reliable shop that has got great critiques and scores from other buyers and business sector advisors. This will ensure you are getting through with a well-known store that delivers good services and support to it’s patrons. Many thanks for sharing your opinions on this weblog.
whoah this blog is great i love reading your posts. Keep up the good work! You know, many people are looking around for this information, you can help them greatly.
Thank you for another informative web site. Where else may I am getting that kind of information written in such a perfect approach? I’ve a challenge that I am simply now working on, and I’ve been at the glance out for such info.
Thanks for sharing your ideas. The one thing is that students have an option between federal student loan plus a private education loan where it truly is easier to decide on student loan debt consolidation loan than through the federal student loan.
I do enjoy the way you have framed this particular challenge and it really does provide me a lot of fodder for consideration. Nevertheless, through what I have seen, I just simply trust when the remarks pile on that people keep on point and not get started upon a soap box associated with some other news of the day. Still, thank you for this fantastic point and though I can not really concur with it in totality, I value your standpoint.
Thank you for your articles. http://www.kayswell.com They are very helpful to me. Can you help me with something?