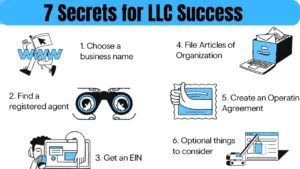
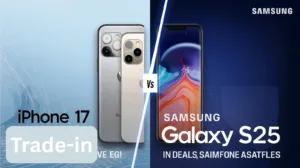
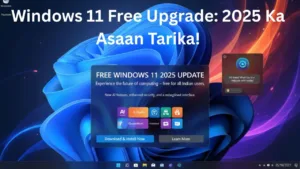
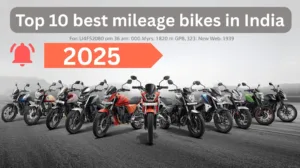
How to Take Screenshots in Windows 10 (Complete Guide)

Windows 10 offers multiple ways to capture your screen, from simple keyboard shortcuts to advanced third-party software. Below, we explore all the options in detail.

How to Take Screenshots in Windows 10

1. Built-in Windows 10 Screenshot Methods

A. Print Screen (PrtScn) Key

  • Full Screen → Copy to Clipboard:
    Press PrtScn (captures entire screen to clipboard, paste with Ctrl + V in Paint, Word, etc.).
  • Active Window → Copy to Clipboard:
    Press Alt + PrtScn (captures only the active window).
  • Save Screenshot Directly as PNG:
    Press Win + PrtScn → Saves to Pictures > Screenshots (filename: Screenshot (1).png).

B. Snipping Tool (Classic & Snip & Sketch)

  • Open Snipping Tool:
    Search for “Snipping Tool” in the Start Menu.
  • Options: Free-form, Rectangular, Window, Full-screen.
  • Delay feature (1-5 sec) for timed captures.
  • Snip & Sketch (Newer & Faster):
    Press Win + Shift + S → Select area → Edit in Snip & Sketch.
  • Auto-saves to clipboard.
  • Open Snip & Sketch app to annotate & save.

Open Snipping Tool

Select the Start  button, enter snipping tool, then select Snipping Tool from the results. You can use these shortcuts for getting things done with Snipping Tool faster:

  • Press Windows logo key  + Shift to open the snipping tool overlay to capture an image snapshot.
  • Press Windows logo key  + Shift + R to open the snipping tool overlay to capture a video clip.
  • Press Print Screen (PrtSc) for a static image snapshot of your entire screen and place it in your clipboard.

Work with your screenshots

With Snipping Tool open, select one of the following to create and work with your screenshots.

See also  Best ai for image generation of 2025

In Snipping Tool, select Snipping Mode. and choose the kind of snip you want and select New.

  • Rectangle: Allows you to select a rectangular area to capture.
  • Window: Allows you to select a window that you want to capture.
  • Full screen: Immediately captures a snapshot of the entire screen.
  • Freeform: Allows you to draw a freeform shape to select the area you want to capture.

Depending on the option you select, you would see the entire screen change slightly to gray indicating you’re ready to capture a snip.

After you capture an image snip, you can:

  • Write or draw on or around it by selecting the Pen or Highlighter buttons.
  • Add shapes or emojis to the snip by selecting the Shapes button.
  • Select Eraser to remove the lines or shapes you’ve added.
  • Crop the image by selecting the Image crop button.
  • Select Text actions button to extract and copy desired text from the snip.
  • Select Undo or Redo to undo or redo your annotations.

To capture a video snip, open Snipping Tool, select the Record button, then select New, or press Windows logo key Shift + R. Select the area of the screen you wish to record, then select Start. When you are done, select Stop. At this point you can save the recording as-is or select Edit in Clipchamp to work with it in the Clipchamp video editor. screen capture software windows 10.

C. Xbox Game Bar (For Games & Apps)

  • Press Win + G → Click Camera Icon or press Win + Alt + PrtScn.
  • Screenshots save to:
    Videos > Captures (in .png format).
  • Supports screen recording (Win + Alt + R).
See also  Best Home Workout Equipment for Beginners in 2025: A Complete Guide

2. Third-Party screen capture software Tools

A. ShareX (Free & Powerful)

screen capture software windows 10
  • Features:
  • Scrolling capture (full webpage).
  • Screen recording (GIF/MP4).
  • OCR (extract text from images).
  • Auto-upload to Imgur, Dropbox, etc.
  • Download: https://getsharex.com

B. Lightshot (Simple & Fast)

C. Greenshot (Lightweight & Open Source)

D. Snagit (Paid, Professional)


3. Browser Extensions (For Webpage Screenshots)

A. FireShot (Chrome/Firefox)

  • Capture full-page screenshots.
  • Save as PDF/PNG or copy to clipboard.

B. Nimbus Screenshot

  • Annotate, blur sensitive info, record screen.

4. Bonus: Screen Recording in Windows 10

  • Game Bar: Win + G → Record with Win + Alt + R.
  • OBS Studio (Free & Advanced): https://obsproject.com
  • Camtasia (Paid): Best for professional editing.

Which Method Should You Use?

NeedBest Tool
Quick screenshotWin + Shift + S (Snip & Sketch)
Full-screen saveWin + PrtScn
Scrolling captureShareX or Snagit
Annotate/editLightshot or Snagit
Game/App screenshotWin + Alt + PrtScn (Game Bar)
Full-page webpageFireShot (Browser Extension)

Final Tips

  • Cloud Backup: Use OneDrive to auto-save screenshots (Settings > AutoSave).
  • Shortcut Reminder:
  • Win + Shift + S = Quick snip
  • Win + PrtScn = Instant full-screen save
  • Alt + PrtScn = Active window only

Would you like a step-by-step guide for a specific tool? 😊

ArtCAM 2018 Software Download

Leave a Comment